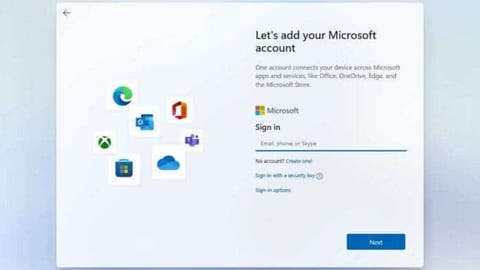
On Windows 11, Microsoft really wants you to use a Microsoft account when setting up your computer. There sure are benefits of having it in your desktop or PC. For example, it works well with cloud services like Office or Onedrive. And it lets you easily sync things between different computers. But there are reasons why you might not want to use a Microsoft account when installing Windows 11. You might be using the device for a brief period of time. Or maybe you still prefer the old way of setting up Windows without needing any usernames or passwords. But the issue is that Microsoft is making it more difficult to set up Windows 11 without an account. However, we now have a workaround to install Windows 11 without a Microsoft account.
How to setup Windows 11 without a Microsoft Account
There’s a neat trick that allows you to set up Windows 11 using a local account. If you’re not familiar with the term, a local account is the combination of a password and username that you use to log into a Windows computer. Basically, this process will let you install the operating system in the traditional way.
There are actually two methods of doing it. The first process will require you to enter a command so that Windows doesn’t ask for an internet connection during installation. Another method is using a tool called Rufus to prepare an install disk that simply removes the need for login in the first place. We’ll talk about this method later in this article.
If you have a new PC that already has Windows 11 installed. Or if you have a bootable disk that you are using to install Windows on your computer, you can follow these steps:
1. Start the setup process until you reach the “Choose a country” screen.
2. Now, it’s time to disconnect from the internet. To do this, press Shift + F10 to open the command prompt.
3. In the command prompt, type in OOBE\BYPASSNRO (make sure all the letters are capitalized and there are no spaces) and press Enter. This command will disable the internet connection requirement, but not the internet.
4. After this, the computer will reboot and bring you back to the same screen. Once again, press Shift + F10 to open the command prompt.
5. This time, type in ipconfig/release (make sure all the letters are small and there are no spaces) and press Enter. This will finally disable your internet connection.
6. You can now close the command prompt and continue with the installation.
7. Choose your region and keyboard settings.
8. Windows will display a “Let’s connect you to a network” screen. Simply click on “I don’t have the internet” to proceed.
9. A new login screen will appear asking “Who’s using the device.” Enter a username for your local account, click Next, and set a password.
10. You can now complete the rest of the installation process just like you normally would.
Following these steps will allow you to set up Windows 11 without the need for a Microsoft account.
Create Windows 11 disk that allows bypassing Microsoft account
Now let’s move on to the second part. You can also create an installation disk that has the “no Internet required” setting already built in. To do this, you will need an additional PC or desktop. Here are the steps:
1. First, download the Windows 11 ISO file from a trusted source. Also, download and install Rufus version 3.19 or a newer.
2. Insert the USB flash drive that you want to use. Remember that the drive will be completely formatted during the process of making it bootable, so make sure to back up any important files beforehand.
3. Run Rufus on your device and select the USB drive (if it’s not already selected).
4. Now, choose the downloaded Windows ISO file and click the Start button at the bottom.
5. A dialog box will appear with a few options to customize Windows installation.
6. Toggle the option that says “Remove requirement for an online Microsoft account” to on. And click OK.
7. If you see a warning message from Rufus stating that all data on the USB flash drive will be destroyed, click OK. This is expected because Rufus will overwrite all contents of the drive.
8. Rufus will take a few minutes to copy files to the USB flash drive. Once it’s done, you will have a bootable flash drive ready for installation.
9. You can now proceed to set up Windows as you normally would.
By following these steps, you can create a bootable USB flash drive that lets you install Windows 11 without a Microsoft account.
