Most smartphone users are familiar with taking screenshots on mobile devices to show others certain things you’re viewing. However, the feature that is present in smartphones, originated from PCs. While it is a pretty standard feature for expert PC users, it may not be for newcomers. Screenshots can be useful in various scenarios, especially at work. You can record the content you’re working on, take a screenshot to better illustrate things you’re doing, or guide other users through certain tasks. You can also capture screenshots to show bugs, to have proof of your work, and more. There are many reasons to know how to capture screenshots on a PC, and through this article, we will guide you through the 4 easiest methods to do so. (Via).
There are multiple ways to accomplish this simple task on Windows PCs. We’ve detailed the easiest methods below. They will work well in Windows 11 or Windows 10, and we will also teach you to capture screenshots on Mac and Linux Distros. So, without further ado let’s dive into the 4 easy ways to take screenshots on PC.
How to Take a Screenshot on a Windows PC with the Snipping Tool
With modern Windows releases, Microsoft shipped the Snipping Tool to users. It’s a built-in screen-capture tool that does its job in a satisfactory way. It’s not the most robust or versatile feature when you want to take simple snapshots. However, it allows the user to better determine and capture portions of their desktop and display them as a screenshot.
How to use the Snipping Tool

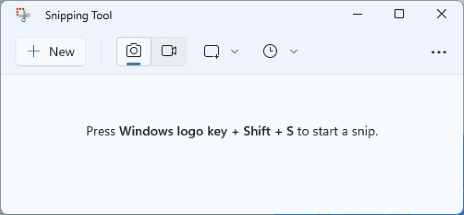
To start using the Snipping Tool for Screenshots, simply type “snipping tool” into the taskbar’s search box and select the resulting app.
Step 1: Windows 10 users will see a notification that it’s “moving to a new home” in a later update. In Windows 11, the tool is still available, but Microsoft encourages users to try the Win + Shift + S keyboard shortcut.
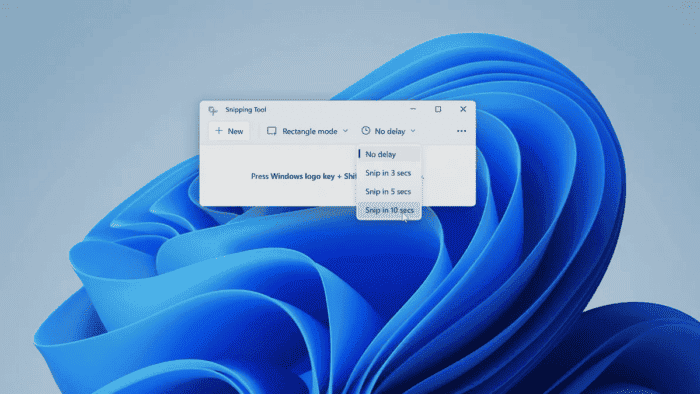
Step 2: On Windows 10, select the Mode button to expand the menu. You find four screen-capturing options: Draw a Windows (Free-Form Snip), Box in an Area (Rectangular Snip), Capture the Current Windows (Window Snip), and capture the entire screen (Full-screen Snip). On Windows 11, you’ll need to select New or Press the Win + Shift + S keyboard shortcut in order to start a snip. Once you’ve done either, the screen will darken a bit and you’ll be presented with the four “mode” options we’ve mentioned above.
Step 3: Select one of the modes and start taking your screenshots. The Snipping Tool interface will display your screenshot. You can even perform some light edits like using a pen or highlighter, or erase something. In Windows 11, the editing screen will show up automatically. If it does not show up, you’ll have to select a notification that pops up first in order to open the editing screen.
Step 4: Once you’re done editing with the Snipping Tool, select File in the upper-left corner and then click the Save option listed on the drop-down menu. In Windows 11, you need to select the “Save as Disk” icon in the top-right corner. Name your file on the screen that pops up, and select the Save button.
How to Capture Screenshot on Windows 10 with Old Snip & Sketch Tool
On Windows 10 there is also another tool to capture screenshots. Before the Snipping Tool, users have been served with the Snip & Sketch Tool. This feature is no longer available with Windows 11. However, if you’re a die-hard Windows 10 user and want to use the former solution, we can also give you some tips on how to use it.

Step 1: In older releases, you can call forth the Snip & Sketch Tool with the Windows + Shift + S shortcut. The screen darkens and renders a five-button toolbar along the top. You will get the same functions found in the older Snipping Tool. However, if won’t save your screenshots as a file. Instead, the image goes straight to your clipboard first.
Step 2: You will also see a desktop notification that informs you that the image has been copied to the clipboard. The same notification gives you the option to edit the captured image within the Snip & Sketch app. You can access this latter option by selecting the desktop notification. If you select the notification, the screenshot loads within the app. From there, you’ll be able to crop the image and apply a pen, pencil, highlighter, or eraser.
Step 3: If you load the Snip & Sketch app instead, select the drop-down arrow next to the “New” Button in the top-left corner and select “Snip Now” in the drop-down menu. The screen darkens, and the five-button toolbar appears. Take your snip, and your desired image should automatically load in the Snip & Sketch app, ready for further editing.
Step 4: Save the image anywhere on your PC by choosing the Disk-style button. If you want to edit and save the screenshot using any installed image editor, select the Three-dot icon on the toolbar and choose the “Open With” option on the drop-down menu. In Windows 11, we have the “Edit in Paint” button, to edit the screenshot via Microsoft Paint’s app.
How to Take A Screenshot on a Windows PC using Classic Keyboard Shortcuts
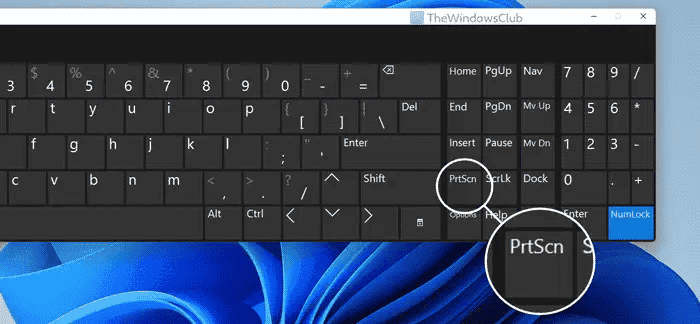
If you’re a fan of the classic method, we will also teach you on how to capture with the conventional PrintScreen shortcut. However, you will be surprised to know that Windows provides up to six methods for taking screenshots using keyboard shortcuts. The first three methods are based on the Print Screen (PrtScn) key, while the remaining use the Windows (Win) key.

On external keyboards, you’ll find a dedicated PrtScn key located in the upper-right corner. When it comes to laptops, the command may be combined with another function on a single key. Some models will require you to press the Function (Fn) key to enable the Print Screen Commands. Below, you will see details about the six screen-capture commands available:
The Keyboard Shortcuts (Windows)
- Print Screen (PrtScn): Captures the entire screen. By default this method does not save the image as a file. It merely sends the captured image to the Windows clipboard. On Windows 11, the Print Screen Button may automatically open the Snipping Tool. However, this can be disabled.
- Alt + Print Screen: Captures a Single Window. It’s useful when you want to show only a particular window rather than your computer’s entire screen. This does not save the image directly, and only puts the print on the clipboard.
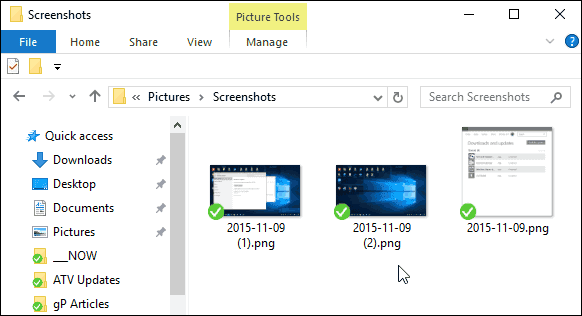
- Win + Print Screen: Captures the Entire Screen. The main difference here is that Windows saves the image as a file. By default, it is sent to C:UsersPictures>Screenshots or C:UsersOneDrive>Pictures>Screenshots.
- Win + Shift + S: Captures a screenshot using the built-in screenshot tool called Snip&Sketch (Or the new Snipping Tool app in Windows 11). The screen dims and provides four choices on a small toolbar. This tool does not save captures as an image. It merely sends them to the clipboard.
- Win + G: Opens the Xbox Game Bar. Select the Capture Button and then the Camera Icon. This tool will save the image to C: Users>>”UserName”>Videos>>Captures.
- Win + Alt + Print Screen: Captures the active window and saves the file directly. This command saves an image to C: Users>
In some cases, the screen flickers or dims to signify that Windows has grabbed a screenshot. If this does not happen, Open the File Explorer and head to their respective default locations to see if Windows saved your image.
Take a Screenshot on a Windows PC: Using OneDrive
If you’re an avid user of OneDrive and its features, you can use the cloud app to take screenshots and share them to other devices that are synced. It does not save screenshots by default. So you need to select the Cloud icon next to the System Clock. If the the icon is not appearing, you need to open the OneDrive app and sign in to your account. After selecting the Cloud icon, choose the Help & Settings gear icon and select Settings on the pop-up menu. Next, choose the Backup tab in the resulting pop-up window. Check the box under Screenshots and select OK.

Once the Screenshots are assigned to OneDrive, you can use the above methods to automatically save a Print to OneDrive. You will receive a notification once your image is saved. You can them access the screenshots on any device synced to your OneDrive account.
How to Take Screenshots on Other Devices (Mac, Linux, Chromebook or Surface)
On Mac computers
If you’re a Mac user, and wants to take a screenshot there are also some methods to capture the screenshot. It’s simple and the easiest method involves the use of some keyboard shortcuts. The Command + Shift + 3 will capture the whole screen, while the Command + Shift + 4 will let you draw out a selection box.
With Surface
To capture a screenshot on a Microsoft Surface device simply Press and Hold the Volume Down Button + Power button at the same time. It’s the easiest of the methods.
On a Chromebook
There are a few different methods to capture screenshots with Chromebooks, but the easiest is the keyboard shortcut. Press Control + Show Windows keys to capture the whole screen. Meanwhile, the Control + Shift + Show Windows will let you capture a selected area.
On Linux
Linux will also support the keyboard shortcuts for the print screen. You may find different options through the various Linux distributions available. So, the simplest method that will work across different Linux distros is the keyboard shortcut method. You can simply press the PrintScreen button to capture the whole screen, or the Alt + PrintScreen to capture the current window.
Conclusion
As you can see there are multiple ways to capture screenshots regardless of your Operating System and Computer. It’s a neat and simple feature that can be quite useful for work environments and even for casual things.


