Losing your MacBook, whether through an inadvertent mistake like leaving it on a plane or a disheartening event such as theft, can evoke a sense of dread and loss. However, amidst such distress, there’s a beacon of hope offered by Apple’s Find My network. This ingenious feature, seamlessly integrated into macOS, iPadOS, and iOS, serves as a dependable lifeline for devout users, offering a secure and efficient means of retrieving their misplaced or stolen devices.
Unlike certain counterparts that reserve advanced surveillance capabilities behind paywalls, Apple’s Find My network stands out for its accessibility — it’s entirely free. Yet, unlocking its protective prowess requires a few essential steps to be undertaken. (Via: DigitalTrends).
Find My Network – A Powerful Tool to Recover your Lost MacBook
If you’re suffering in this particular scenario where you have just lost your MacBook, don’t let your hopes down. If this happened recently, there is still hope for finding your costlier computer. Through this article, we will guide you through the first steps you need to take to recover access to your device. To streamline the process and alleviate any potential confusion, we’ve curated a comprehensive step-by-step guide. This guide is designed to walk you through the seamless registration of your MacBook on the Find My network, ensuring that you’re equipped with the necessary knowledge to harness the software’s capabilities should your computer mysteriously vanish.

This guide is useful even for those who are reading this article and fortunately have their MacBook safe. You will learn some extra security steps to keep your device always in sight, so if you happen to lose it anytime, you will have the tools needed to find it.
Apple’s Find My network is a robust system integrated seamlessly across macOS, iPadOS, and iOS devices. It leverages a combination of wireless protocols, including Wi-Fi, Bluetooth, and GPS signals. The goal is to accurately pinpoint the location of lost devices. Users can activate Find My through their iCloud settings, enabling them to track the whereabouts of their devices in real time.
Key Features and Benefits:
- Free Accessibility: One of the hallmarks of the Apple Find My network is its accessibility. Unlike competing services that may require additional subscription fees, Find My is entirely free to use, ensuring that users can avail themselves of its benefits without any financial constraints.
- Precision and Reliability: The Find My network prides itself on its accuracy, even in scenarios where devices are offline or in sleep mode. By leveraging a combination of wireless protocols and innovative algorithms, it offers users a reliable means of locating their devices under various circumstances.
- Remote Management: In addition to locating lost devices, Find My enables users to take proactive measures to secure their data. Through remote actions such as playing sounds, locking devices, or initiating a remote wipe, users can safeguard their sensitive information and mitigate the risks associated with theft or loss.
- Seamless Integration: Find My seamlessly integrates across Apple’s ecosystem of devices, allowing users to track their MacBooks from their iPhones, iPads, or even other MacBooks. This cohesive integration enhances the user experience, offering a unified platform for device management and security.
Enhancing Security with AirTags
For added security, users can complement the Find My network with AirTags, discreetly tracking their belongings and providing an additional layer of protection against theft or misplacement. To bolster your safety measures, consider incorporating an AirTag into your strategy. Placing an AirTag inside your MacBook’s laptop bag provides an additional layer of protection and makes the tool even more powerful when you’re trying to locate the device.
Configuring Find My on Your MacBook
Before delving into the details of using Find My to track down a misplaced MacBook, it’s imperative to grasp the setup process. Whether you’re a student lugging your MacBook around campus, a frequent traveler, or simply a regular at your local coffee shop, activating this indispensable tool is paramount. In the unfortunate event of your MacBook going astray, Find My stands as your best bet for a successful recovery.
- Step 1: Activating Location Services
To kickstart the process, navigate to “Security & Privacy” within your System Preferences. From there, delve into the “Privacy” section. Here, you’ll find the option to enable Location Services for your MacBook.
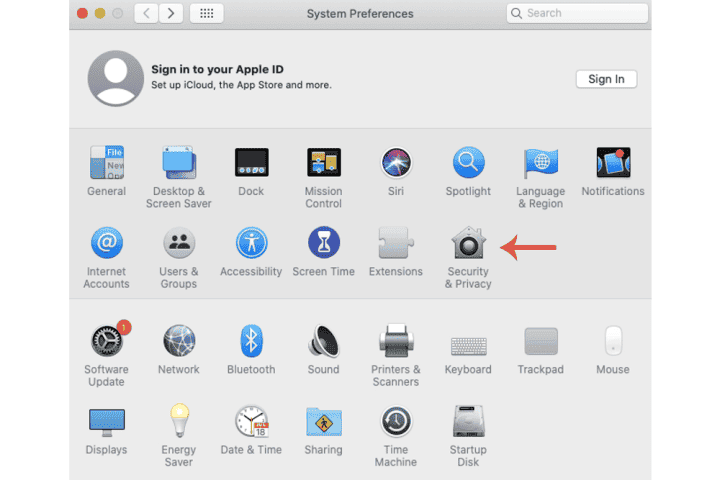
- Step 2: Enabling Location Services for Find My
Once you’re within the “Privacy” section of “Security & Privacy,” locate the checkbox labeled “Enable Location Services.” After ticking this box, proceed to select “Find My” from the list of available options.
- Step 3: Configuring Find My Mac with iCloud
Next, click on the Apple ID icon within System Preferences. This will lead you to the iCloud tab. Here, locate and select “Find My Mac.” Once chosen, ensure to check the “Allow” box to grant the necessary permissions.
- Step 4: Activating Offline Finding (Optional)
While Offline Finding should typically be enabled by default, you can ensure its activation by selecting the “Options” button within the Find My Mac field. This step allows you to confirm that your MacBook can be located even when it’s offline.
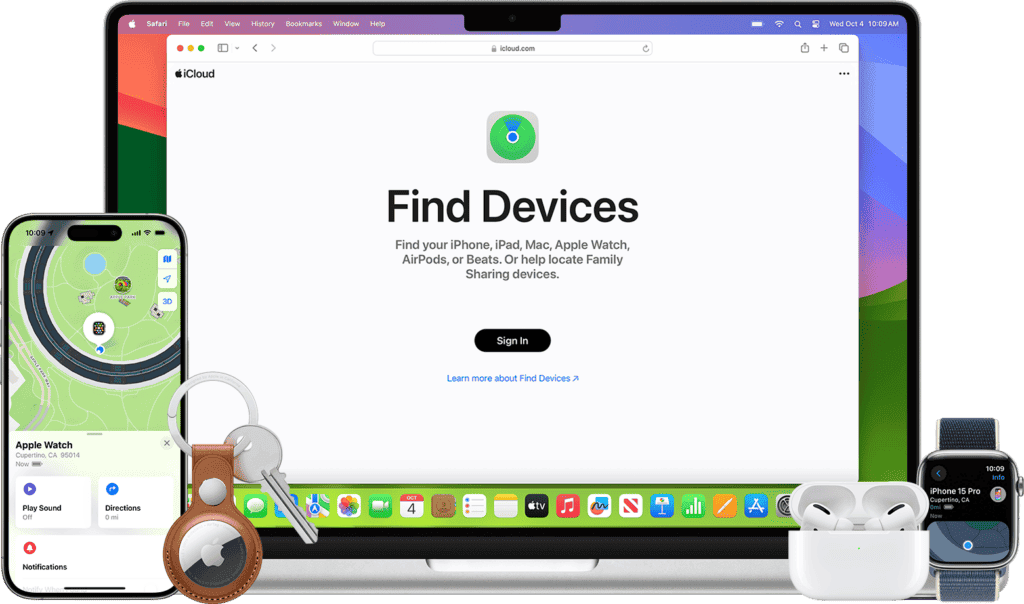
Utilizing Find My to Retrieve a Lost MacBook
If you’ve proactively activated Find My on your MacBook before its disappearance, here’s how you can initiate the search:
- Step 1: Access iCloud.com/find from another device and sign in with your iCloud account. Opt for the “All Devices” option.
- Step 2: Await the Location Services to pinpoint your MacBook’s whereabouts, which will then be displayed.
- Step 3: Upon locating your device, you’ll be presented with several options. Utilize the “Play Sound” feature if your MacBook is nearby to help you locate it audibly. Alternatively, if your device has been stolen or you’re concerned about data security, consider either “Locking” it or “Erasing” it remotely. These latter options are prudent measures in such circumstances.
Utilizing Find My iPhone to Locate a Lost MacBook
If you prefer using your smartphone over a desktop or laptop to locate your lost MacBook, you can do so with the Find My iPhone app. Here’s how:
- Step 1: Open the Settings app on your iPhone and tap on your Apple ID at the top. From there, navigate to the “Find My” section. Select your MacBook from the list of available devices.
- Step 2: Beneath the name of your MacBook, tap on “Show in Find My.” This action will trigger the location tracking for your MacBook within the Find My app on your iPhone.
- Step 3: Once you’ve selected “Show in Find Me,” you’ll gain access to the location of your MacBook directly on your iPhone. From here, you can utilize various options such as playing a sound to locate it audibly or receiving directions to its precise location. Additionally, if necessary, you have the option to remotely wipe the entire device by accessing the “Erase This Device” setting.
Finding a Lost MacBook in Offline Mode
If your MacBook is lost and in sleep mode, Apple’s offline search mode can still help locate it through the utilization of Bluetooth signals with other nearby Apple devices. Here’s what you need to do:
- Step 1: On your other Apple device, such as an iPhone or iPad, navigate to Settings, then tap on your Apple ID, and proceed to select “Find My.” Within the Find My menu, check if the Find My network is enabled. This network utilizes Bluetooth signals from nearby Apple devices to aid in locating your lost MacBook even when it’s offline.
- Step 2: Check for Device VisibilityWithin the main settings page of your Apple ID, verify if your MacBook is listed among the devices. Particularly, if your MacBook is situated in a location like a coffee shop or an area densely populated with other Apple devices, there’s a higher likelihood of it being detected, even if the laptop is closed.However, it’s essential to acknowledge that there’s no guarantee of locating a lost MacBook. While enabling Find My significantly enhances your chances, unforeseen circumstances may still impede its recovery. In such instances, it’s advisable to report the situation to the relevant authorities, utilizing your MacBook’s serial number found on its packaging box and purchase receipt.Additionally, in the unfortunate event of losing your MacBook, it’s crucial to promptly secure your sensitive data. Change all login credentials and your Apple ID to prevent unauthorized access.

Extra Tip: Consider Using an AirTag for Added Security
As previously said, to bolster your safety measures, consider incorporating an AirTag into your strategy. This simple technology makes it easy to locate devices that are susceptible to losses, and you can add an extra layer of security to anything you want to keep always safe under your “view”.
FAQs About Find My Network and Important Tips For Recovering your Stolen/Lost MacBook
The Find My Network is an important system created by Apple to keep its devices safe and improve the security of owners. The tool is powerful but still has certain limitations, below we will discuss some of the frequent questions about Find My.
Is the Find My Network Free?
Utilizing the Find My desktop or mobile app typically incurs no additional charges beyond the standard data usage for locating your lost item. Since most of us routinely pay for Wi-Fi and cellular data, the cost associated with using data for the Find My service is typically negligible.
Accuracy of the Find My Network
Apple’s Find My network is renowned for its high accuracy in locating lost devices. It leverages various wireless protocols, including Wi-Fi, Bluetooth, and GPS signals, along with any Find My optimizations enabled on your Apple device.
To maximize performance, ensure that all your Apple ecosystem products are running the latest software versions. This ensures optimal performance and access to the latest Find My capabilities.
Is it Possible to Recover Files from a Stolen MacBook?
In the unfortunate event of a stolen MacBook where files are deleted by the perpetrator, several measures can be taken to protect your data. Setting up defenses before your MacBook goes missing is crucial.
One avenue for recovering lost files is through Apple’s Time Machine backup tool. Additionally, consider storing important data on various cloud storage platforms or external HDDs/SSDs to ensure redundancy and accessibility in case of theft or loss.

Conclusion
In an increasingly interconnected world, the loss of a MacBook represents more than just a financial setback! It can disrupt workflows, compromise sensitive data, and undermine personal security. However, with the Apple Find My network, users are empowered with a comprehensive and powerful solution. With it, it’s possible to mitigate these risks and safeguard their investment. By leveraging its advanced features and complementary technologies like AirTags, users can navigate the challenges of device loss with confidence. After all, they will always know that their devices are equipped with a robust tracking system and proactive security measures. Ultimately, the Find My network epitomizes Apple’s commitment to user-centric innovation. Furthermore, it underscores the company’s dedication to ensuring the safety and integrity of its users’ digital experiences.
It is worth noting that the Find My Network is also useful for other devices. The same tool can be used for the iPhone, Apple Watch, and sophisticated AirPods.


