So, you've got your shiny new Windows laptop all charged up and ready to go. Exciting, right? But before you dive headfirst into browsing or cranking out that first document, there are a few key setup steps to take. These steps might seem minor, but trust us, taking care of them now will ensure your laptop runs smoothly, securely, and efficiently for years to come. Let's jump in and optimize your new Windows companion!
Install All the Pending Windows Updates
The first order of business? Updates! Brand-new laptops often don't have the latest security patches and features installed. This is because they might have been sitting on store shelves for a while. To ensure your laptop is running securely and has all the latest bells and whistles, you'll need to install any pending Windows updates.
It's easy! Just right-click the Start button, open "Settings," and navigate to "Windows Update." Here, you'll see if any updates are waiting to be downloaded. If so, simply click "Check for Updates" to get them rolling. Once downloaded, restart your device to install the updates and keep your laptop protected.
Uninstall All the Unnecessary Apps
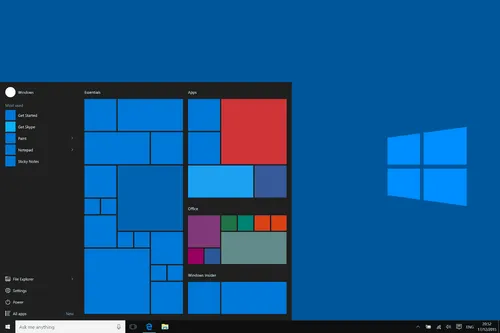
Next up, let's tackle bloatware. These are the pre-installed apps and programs that come with your laptop, but you probably don't need them. We're talking about trial versions of antivirus software, music streaming apps you never use, and weather programs you already have on your phone.
Bloatware not only eats up valuable storage space, but it can also slow down your system by running in the background. Plus, they often have permission to send pesky pop-ups trying to get you to upgrade to their paid services.
Getting rid of them is simple. Right-click the Start button and head over to "Settings" then "Apps" and finally "Installed apps." Here, you can easily identify any unwanted apps. Just click the three dots next to the app and select "Uninstall" to give your laptop a performance boost.
Configure a Back Up for Your New Computer
Now that you've got your laptop running smoothly, let's talk about protecting your precious data. Imagine losing all your photos, documents, and important files! A nightmare, right?
That's why setting up a backup system is crucial. This way, even if your laptop gets stolen or your hard drive crashes, your data is safe and sound.
There are a few ways to approach backups. For reliable, automatic backups, consider online services like Backblaze. These services run silently in the background, continuously backing up your new files. They offer unlimited storage for a very reasonable price.
Looking for a free option? Cloud storage services like OneDrive offer some free storage space for backups. However, these often have limitations on storage capacity and may not back up everything you need.
Here's a pro tip: Don't rely solely on cloud backups. Creating a local backup of your most critical data on an external hard drive is an excellent extra layer of security. Think of it as a double dose of data protection!
Create a Restore Point Just in Case Anything Goes Wrong
Even the best laptops can encounter hiccups. Maybe you install a program that conflicts with something else, or perhaps a setting accidentally gets changed. Don't worry; there's a built-in Windows feature called System Restore that can help!
A system restore point is like a snapshot of your computer's settings and files at a specific point in time. Think of it as a time machine for your laptop! If you run into an issue that you can't fix with normal troubleshooting, you can use a restore point to revert your system back to a point when everything is working smoothly.
Here's the beauty of it: a restore point only affects system files and settings, not your personal data like documents or photos. So you can use it without fear of losing anything important.
Creating a restore point is simple. Just type "System Restore" in the Windows search bar and select "Create a Restore Point." Give it a descriptive name (like "New PC Setup") and click "Create." That's it! Now, you have a safety net in case you encounter any bumps in the road.
Configure the Ad Settings of Your New Windows Laptop
Let's face it, ads can be distracting. Microsoft sprinkles them throughout your Windows experience, from the Start menu to File Explorer. While they might suggest interesting apps or features, they can clutter your view and interrupt your workflow.
The good news? You can silence the ad noise! While there's no magic button to turn them all off at once, you can easily disable them in each location. We'll show you how to do just that in a future article so stay tuned! In the meantime, you've taken some great steps to optimize your new Windows laptop. Enjoy exploring its capabilities!
Enable Find My Device and Windows Hello

Imagine this: you misplace your laptop at the coffee shop. Panic sets in! But fear not, with "Find My Device" enabled, you can track your laptop's location if it goes missing. This handy feature even lets you lock it remotely to prevent unauthorized access and send a message to the lock screen in case someone honest finds it.
Enabling "Find My Device" is easy. Just make sure you're signed in to your laptop with an administrator Microsoft account. Then, open Settings, navigate to "Privacy & Security" and "Find My Device." With a simple toggle, you've added a powerful layer of security to your laptop.
Tired of typing long passwords every time you want to use your laptop? Windows Hello offers a more convenient and secure solution. You can set up facial recognition, fingerprint scanning, or a PIN for lightning-fast sign-in.
Head over to Settings, then "Accounts" and "Sign-in options." Here, you can choose your preferred method (facial recognition, fingerprint, or PIN) and follow the on-screen instructions. With Windows Hello, gone are the days of struggling to remember complex passwords!
Popular News
Latest News
Loading
